Posts tonen met het label scratchbuild. Alle posts tonen

dinsdag 27 januari 2015

Weltenraum Nahkampf Gefechtseinheit Ausf. B 'Ollie' - part V Lucky 13


Added some decals to the beastie, numbers from a grosserhund kit, the rest from a 1/32 revell volksjager and assorted 1/48 german planes.
The orange bit at the front is meant to break up the rather boring main body. I also changed the graytones of some parts with some filters, but after weathering this might not be visible anymore.
It just needs some more warning decals and it is ready for weathering. 


maandag 19 januari 2015

Weltenraum Nahkampf Gefechtseinheit Ausf. B 'Ollie' - part IV PAINT!

I was lucky enough to get a workshop of lacquer painting from the master in NYC, Jsan from http://jsan9.blogspot.com/.

So afterwards I grabbed the thinner and foul smelling laquers and just went at it! 

It's way different from acrylics, and the thinner reacts with the undercoat, creating weird patterns and stuff. I wasn't able to get the smooth finish I went for, but I love the unexpected texture and mottling so can't complain really.

First layers


And a day later some more


It's drying now from addin ID marks, crappy pictures, but else I'll forget entirely.
Went for orange stripes and might add something more.
Numbers or letters a-coming to.


woensdag 15 oktober 2014

Wienerworner Martian Scout Part II


Washes


Starting to look good, but needed some red
So, more washes


And taking them off again with some cotton buds


Repeat until satisfied


But still thought it lacked some colour, and dust, it needs more dust.

donderdag 21 augustus 2014

Wienerworner Martian Scout

After a long hiatus, I needed something to shift back into gear, luckily I found this picture:


No idea what it is, but the shape is fun so let's do this!
Of course I'll drop the bird, looks crazy.

Sadly, it was a 4 hour (rather frantic) build, so no real work in progress pictures...
All sorta stuff was thrown in, from jojo's to spoons to bombs and engines.


Most armour pieces were texture with MR surfacer 500, detail pictures after painting.


And some basic paints:


And all the armour slapped on:


I imagine this to be some sort of scout, not sure about the scale yet, 1/72 or 1/48 seems to work best.
Maybe it's a worker vehicle? who knows! 
Slapping on oils now, let's see how it turns out.


dinsdag 5 november 2013

Vehitle part III - Leggies!

Made some leggies from all kinds of waste parts, not even sure what most parts are.
The hind legs have their joint attached, for the front legs I attached the joint in the leg-well. Seemed logical at the time.


They might be a bit too long though... I might shorten them after puttying the main body.


The feet and joints need some extra detailing, as well as cables and maybe some armour plates still... but I'll come to those once I know if I need to shorten them.

Now it's time for putty


woensdag 23 oktober 2013

Vehitle part III

Because I wanted the middle of the vehitle to be a bit wider, and because the leg wells needed more dept, I added some plastic around the leg wells to create a raised edge. This should also make for a nice shape when filled out with putty.


The rods are made from leftover sprue, about 3 mm thick.


Then drilled, sawed and sanded a hole for the cockpit. Where I also added walls from plastic card and added a chair (from a 1/20 racecar I think, doesn't fit 1/20 figures though...)


I started on a pilot using 1/24 legs and a 1/20 drivers torso that was quite small for the scale and fitted well with the legs.
He fits his chair, so it all works out  ^_^


Just some major gap filling and then it's on to puttying and mechanical detail, and maybe finishing the legs.

donderdag 17 oktober 2013

Vehitle part II

Started building some leg parts, made from 10 and 25 ml pipets. They were bent and gnarled with a lighter. These will be the lower leg parts that, when folded up, will face the outside. I need to find something for the upper leg, and something to make joints. 


Also found a decently sized ball, just needs some texture.

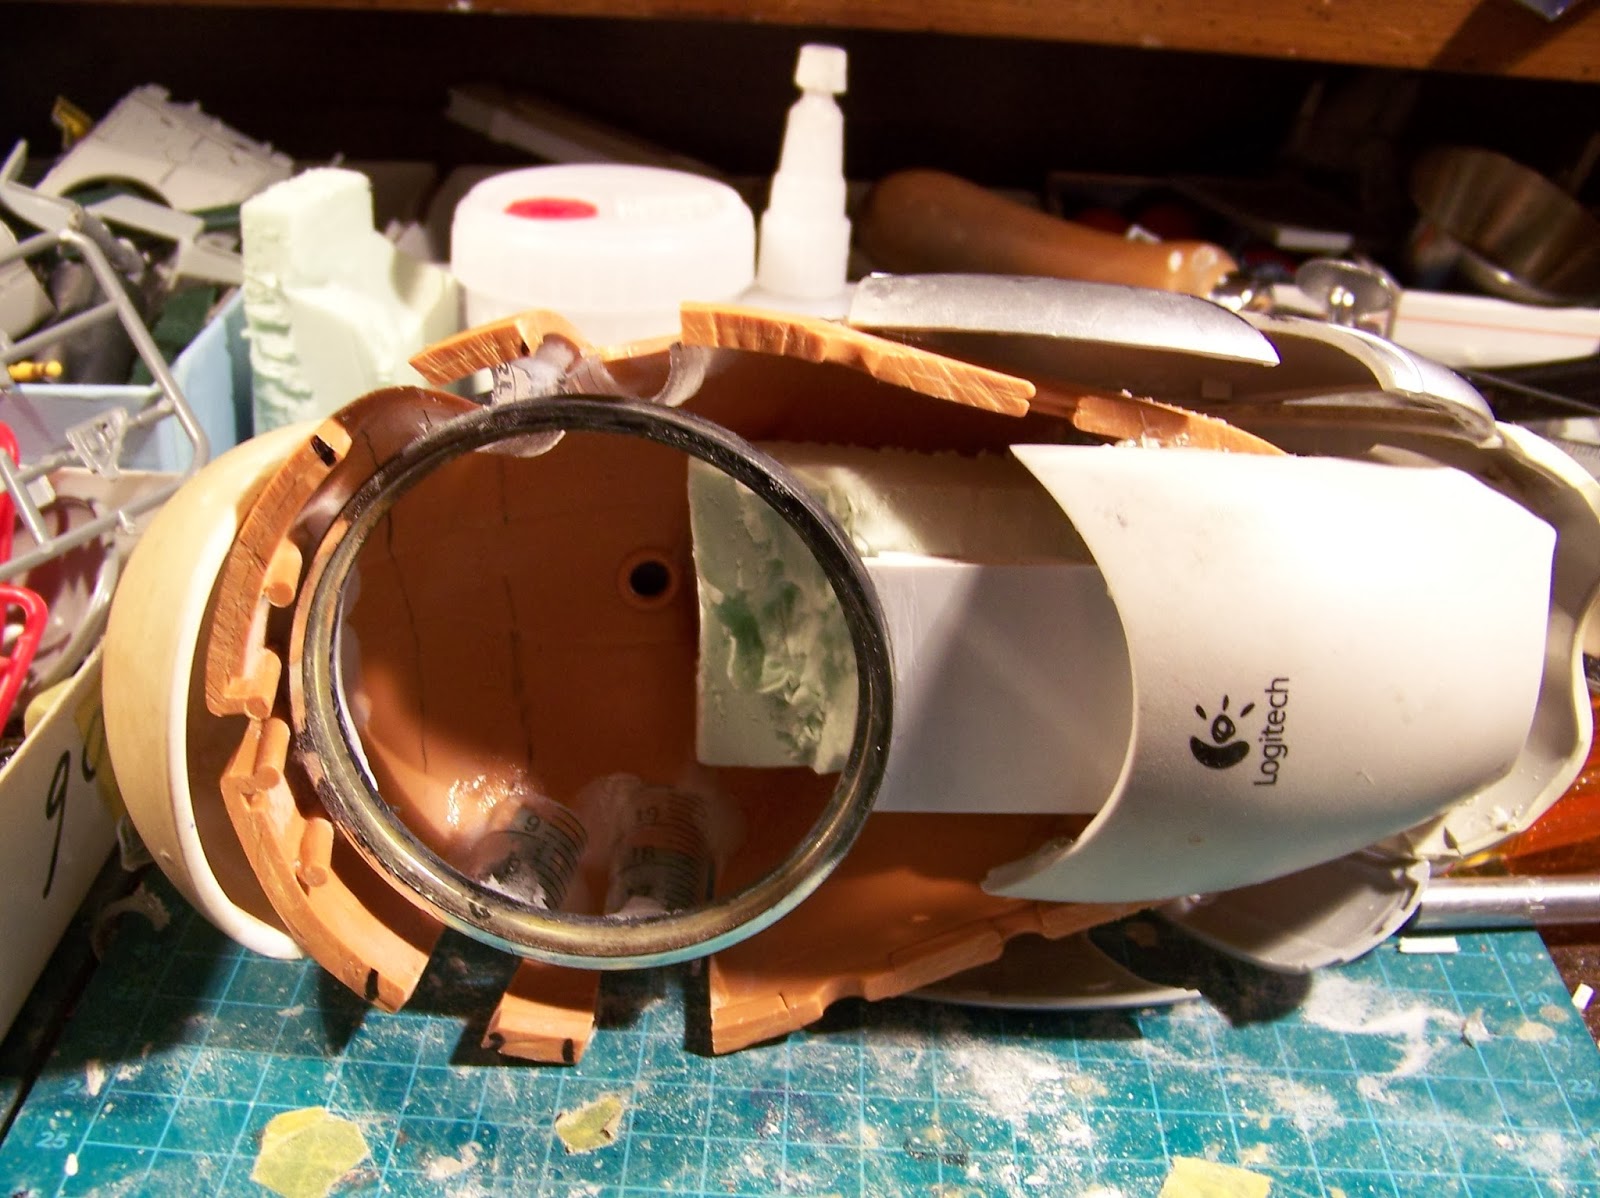
It needed some sort of suspension, something to keep it in place. After trying to make a ring myself, I found a 1/4 (I think) toy motorcross wheel, and the rim was just perfect. So I removed the spokes and figured outa way to keep it in place (foam block, plasticard, superglue :P ).
Also added the start of wheel wells.

I wonder what scale would look best, it's too small for 1/20 (and the driver won't fit anywhere), too big for 1/35, so it seems 1/24 is the only thing left...  oh well, it'll sort itself out.

donderdag 10 oktober 2013

Weltenraum Nahkampf Gefechtseinheit Ausf. B 'Ollie' - part III

Glued it and sprayed it black.

Photo's don't really work, tried different backgrounds, this one is the best. Maybe my camera is simply shitty.

Building a base now to keep it in place during painting.


vrijdag 4 oktober 2013

Vehitle

There is an online contest over at gundamUK, named Level Up, and I thought I'd join in to clear some platsic from the stash and build something fun.  
The goal of the contest is to try and do something you aren't that good at, or haven't tried yet, to expand your skills. I figured it would be a good idea to enter something as finishing and painting something is already a bit beyond me :P
Also, I would like to try and make something with as little pieces of actual models as possible.
I have three small crates full of plastic stuff, eggs, mouses, asthma inhalers, spoons, balls etc.
But I hardly ever use them, because it's so much easier to just start from a kit and then add putty.
And my wife doesn't really appreciate me hoarding plastic I'm not using.

Anyway, I figured I'd try and make something like a vehitle, similar to these.


They are beetle-like, trackball tank with legs  (generally at least), one of the ideas of Kow Yokoyama if I'm not mistaking.

So I selected some stuff from my collection of stuff.


And then I started from the Mr. Potato Head and just added shapes that fitted well (had to cut the spoon handle) and looked right.
I used three computer mice (parts at least), Mr Potato Head, on large plastic spoon and some weird piece of which I have no idea what it was.


Now I just need to find a decent ball to use as trackball, find things for the six legs, and add plenty of putty and detail.

I can still switch it to a hover tank or spaceship, there's a hole in one end that would perfectly fit a thruster...
but I'll try and fit some legs first.